No longer installed by default, you must first install the Windows 10 Projecting to this PC software before you can use it to create a second display using a wireless connection.
Image: DC Studio/Shutterstock
Most of us do not have access to the same level of IT resources at home as we do at the office. This often means that the acquisition of a second or third display monitor is just not in the home office budget. However, with a little ingenuity, an unused laptop and the Windows 10 Projecting to this PC feature, that small obstacle can be overcome.
TechRepublic has covered how to use the Windows 10 Projecting to this PC feature to create a wireless multiple-monitor configuration before, but there is a new twist to this method that may prevent its successful implementation for many users. This how-to tutorial shows you how to amend default Windows 10 settings and install the necessary software, so that you can use the Projecting to this PC feature to create a second display.
SEE: How to reopen offices and keep employees and customers safe (TechRepublic Premium)
Settings for the Windows 10 Projecting to this PC feature are located on the System settings screen. Click to the Start button and select the Settings button (gear icon) on the left-hand menu. Click the System tab and then scroll down the left-hand navigation bar and select the Projecting to This PC link, as shown in Figure A.
Figure A

As you can see, all the Windows 10 Projecting to this PC feature settings are grayed out. This is because the software that makes that feature possible is no longer installed by default. Projecting to this PC is considered an optional feature. Therefore, we will have to install it manually.
SEE: 69 Excel tips every user should master (TechRepublic)
Before you start, be sure you are connected to the internet because we have to download some software from Microsoft.
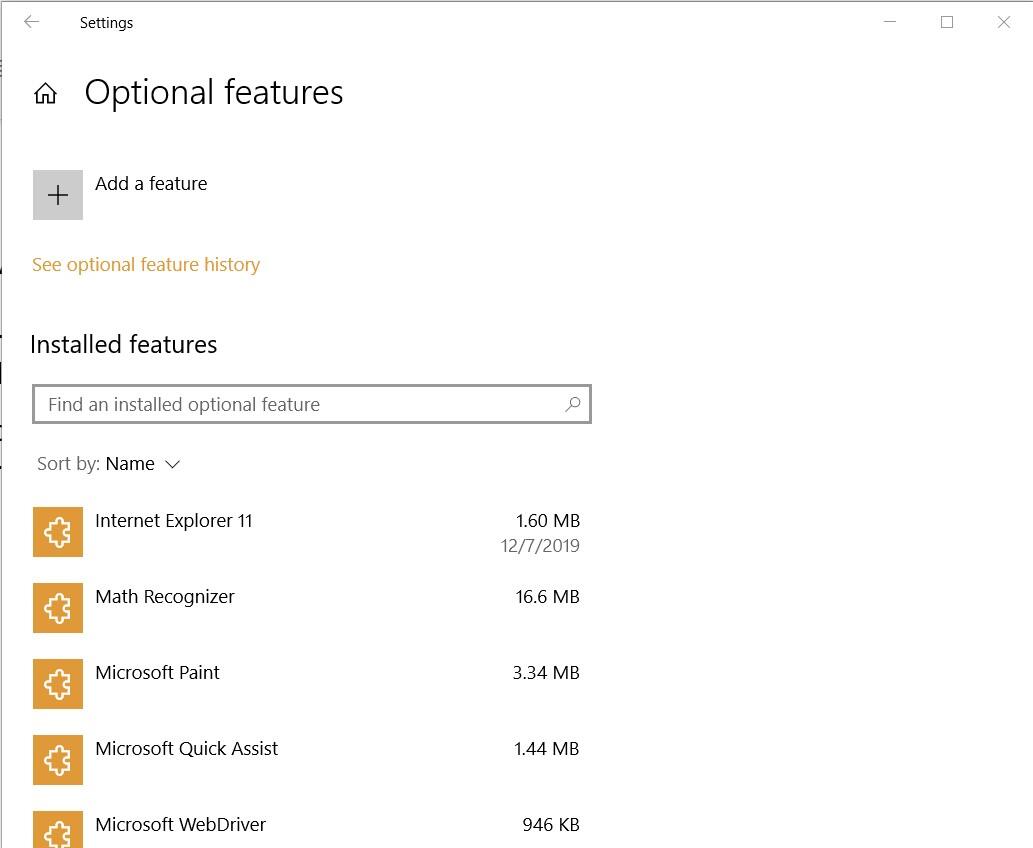
Since you are presumably looking at the screen in Figure A, click the Optional features link on the page to start the optional features install process, as shown in Figure B.
Figure B

On this screen you will see some of the other optional Windows 10 features you have installed on your PC. For our purposes, click the Add a Feature button. From the ensuing list of features (Figure C), search for “wireless display.”
Figure C

Put a check the in the checkbox to add the feature and click the Install button. It will take a few minutes to download and install the software.
When you return to the settings screen for Projecting to this PC, as shown in Figure D, you will see that the feature is no longer grayed-out and is active.
Figure D

Now you can begin the process outlined in How to use Windows 10’s Projecting To This PC feature to create a wireless multiple-monitor configuration to get all the productivity benefits you seek from a second or third display.
24World Media does not take any responsibility of the information you see on this page. The content this page contains is from independent third-party content provider. If you have any concerns regarding the content, please free to write us here: contact@24worldmedia.com

Marnus Labuschagne Caught Off-Guard By ODI Captain Call After Steve Smith Snub

Everyone Is Looking Forward To It, The Standard Will Be Very High – Jacques Kallis On CSA’s SA20

Danushka Gunathilaka Granted Bail On Sexual Assault Charges

Ramiz Raja Sends Legal Notice To Kamran Akmal For Defamatory, False Claims Against The Board

Harbhajan Singh Reckons Mumbai Indians Should Release Kieron Pollard Ahead Of The IPL Auction 2023

Ian Bishop Praises Sam Curran For His Performances On Bouncy Australian Tracks

Why Choose A Career In Child Psychology?